 |
| Home |
| Assembly Notes |
| More Speed |
| More Power |
| An Accurate Speedometer |
| Relocate Controller |
| 72 Volt Mod. |
| Technical Notes |
| My Repair Record |
| Environmental Issues |
| Michigan Moped Law |
|
|
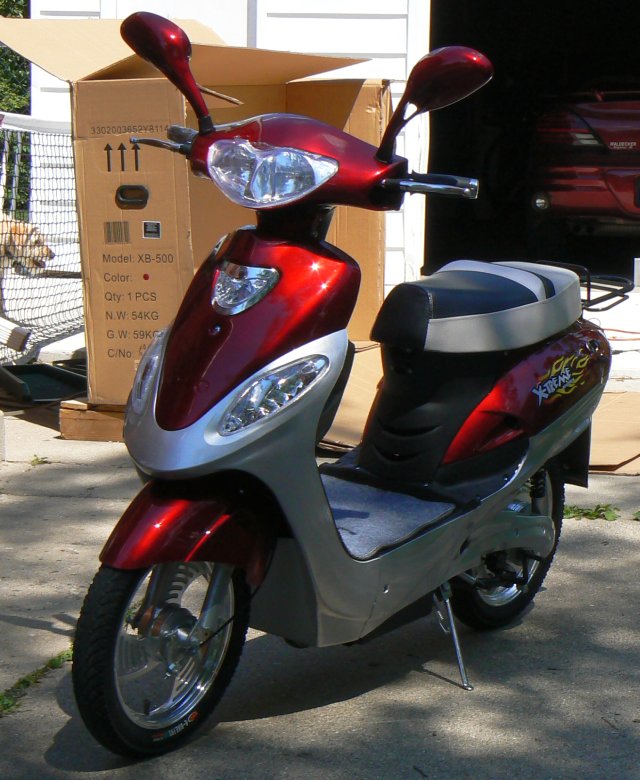
My XB-500 arrived at my home on July 25, 2008 at 1:30 PM. It
was delivered in a double walled cardboard box on a narrow pallett. The
truck driver, rather than driving his huge semi-truck into my
subdivision, parked at a school about a block from my house. He
unloaded the bike in it's package onto a two-wheel dolly, and rolled it
down to my driveway by hand.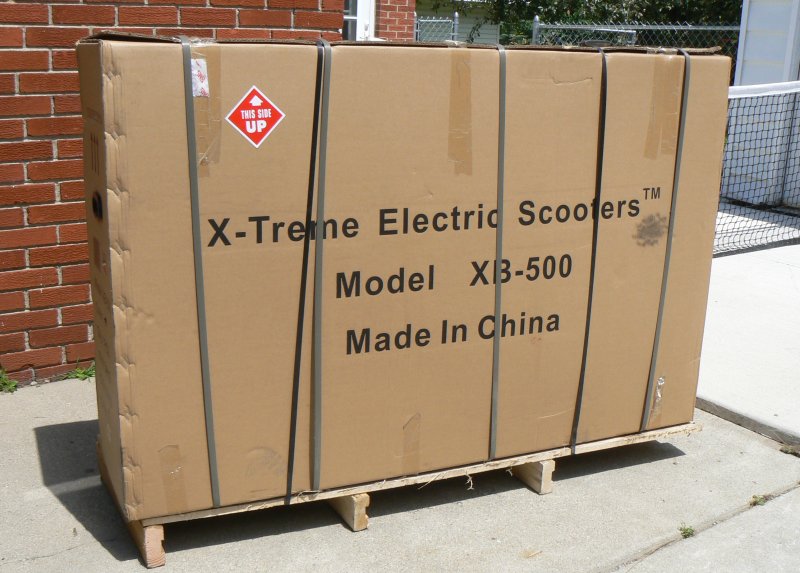
The first thing I did was open the top of the box. There, attached to the handlebars, was a plastic bag containing the manual for the bike, and the keys. Also on top of the seat were the front wheel and the lockable trunk. I opened the manual, and near the end on page 11 were the assembly instructions, which I read before proceeding any further.
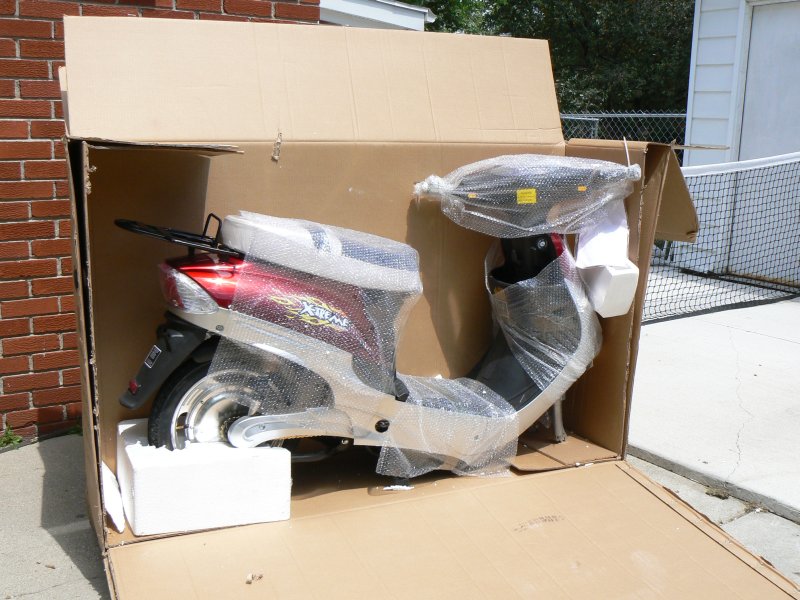
I cut the box open so that one side of it could be folded down. This exposed the entire bike. I then pulled the bubble-wrap off of the lower foot rest area so that I could unlock and remove the battery pack. this made the bike quite light, probably about 70 pounds, and easy to maneuver.
To protect the bike, I laid a foam exercise mat on the ground,
and after getting the bike out of the box, I laid it down on it's side
on the mat. At this point, the handlebars were askew, but you could
tell that this was on purpose for shipping. Following the instructions,
I aligned the handlebars with the front fork and tightened the steering
bolt. I then installed the front lower fender, and the front wheel.
This was very easy to do with the bike lying on it's side. 
The manual
says to tighten the front wheel nuts to the torque specified in the
manual, but nowhere in the manual is the torque for any of the nuts,
bolts, or screws listed. I tightened them to about 25 ft/lbs, and made
sure the washer tabs went into the holes provided in the fork. The
assembly instructions for this part are quite clear, including
pictures. The front brake cable was already attached to the brake
assembly, and all that was necessary was to make a minor adjustment so
that the front brake lever would be able to apply full pressure to the
drum brake.
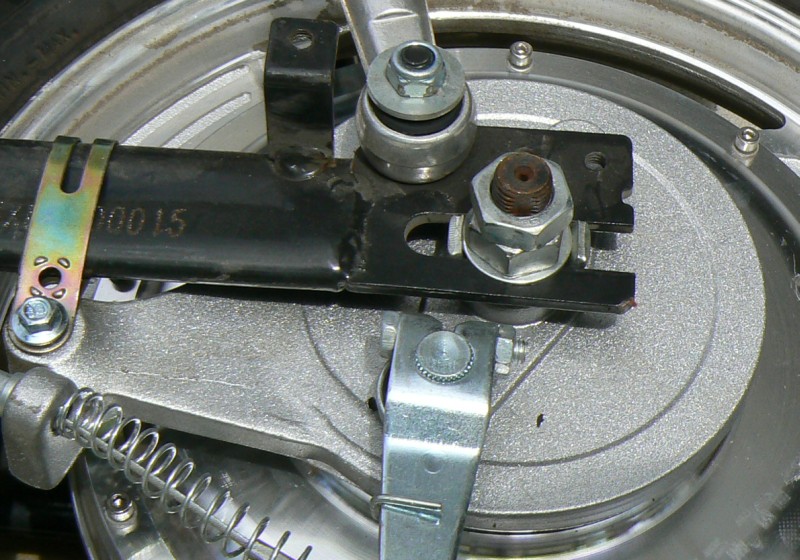
 The assembly instructions, tell you in the Final Check stage to check all nuts, screws, and bolts, including ones not mentioned in the set up, for tightness and fit before riding. This is very important!The
nuts and lock nuts on the rear axle must be very tight, because the
full torque of the motor and the dynamic braking is applied to the rear
axle. If these nuts are not extremely tight, the rear axle will rock
back and forth as you accelerate and decelerate, and eventually wear
out the flats on the inside of the torque washers which keep the rear
axle from twisting. When that happens, your rear axle, which should be
stationary, will be able to spin, and the power and control wires which
go through the center of the axle will be damaged, or even broken
completely. Not good! If you should ever need to disassemble the rear
wheel, I would advise the following procedure for putting it back
together:
The assembly instructions, tell you in the Final Check stage to check all nuts, screws, and bolts, including ones not mentioned in the set up, for tightness and fit before riding. This is very important!The
nuts and lock nuts on the rear axle must be very tight, because the
full torque of the motor and the dynamic braking is applied to the rear
axle. If these nuts are not extremely tight, the rear axle will rock
back and forth as you accelerate and decelerate, and eventually wear
out the flats on the inside of the torque washers which keep the rear
axle from twisting. When that happens, your rear axle, which should be
stationary, will be able to spin, and the power and control wires which
go through the center of the axle will be damaged, or even broken
completely. Not good! If you should ever need to disassemble the rear
wheel, I would advise the following procedure for putting it back
together:
- Re-assemble the axle the same way it was before you took it apart, but without the outside washers and the four big nuts.
- Slice the right outside washer and the two large nuts over the motor wire before connecting it up to the bike.
- Slide the axle into the dropout notch. I'm suggesting that you don't install the chain or pedals.
- Place the left and right outside washers on the axle. Then screw the first nut onto each end of the axle and tighten it just tight enough to hold the axle in place while you align the rear wheel.
- Working on the braks (left) side, use a good quality crescent wrench on the flat parts of the axle to hold the axle steady while usint a 22mm open end wrench to tighten the first nut on that side. Using the crescent wrench to hold the axle still is important because you want to keep from putting stress on the washers, and holding the axle in place while tightening the first nut keeps the pressure off the washers, and you aren't likely to enlarge the inside holes and make them useless.
- With the crescent wrench still holding the left end of the axle, tighten the right
nut to the correct torque. Then go back and tighten the left nut to the
correct torque. Finally, put the second nut on each side, and tighten
these to the correct torque.