|
|
Transferring CDs to a USB Flash Drive
|
Note: Most of the photographs in this article can be enlarged by right clicking on the image, and selecting "View Image"
Most new cars and SUV's no longer have CD player's installed. The newest features allow you to bring your music with you on a USB Drive, plug it into your automotive entertainment system, and play. I have two new GM vehicles, and have found that I can load up to 70 albums on one 4GB memory stick.
You can go to Amazon.com and buy digital albums in MP3 format at an average price less than $8.00 per album. But if you are willing to spend a little time, you can convert CDs that you own to MP3 format, and copy them to a Memory Stick. All you will need is a PC with a CD or DVD drive, some 4GB memory sticks, and some free software. It will take you less than five minutes for each CD you want to convert, and you will end up with a pocket size memory stick that could contain most or all of your music library. Here is how I did this for a friend.
First, I downloaded FreeRIP MP3 Converter from the web. This software is offered by several download sites, but I found only one that did not bundle the software with obnoxious AdWare. It was available at this site:
http://www.freerip.com/
The download file is called FrpSetup.exe, and is 2016 KB. It is identified as Version 5.5.0. Be sure to save the file to your hard drive, and then scan it for viruses before installing.
Once you double-click on the downloaded file, it will install itself on your computer (Windows XP) in a matter of seconds. Depending on your Windows version and setup, you will either see a new desktop Icon appear, or you will have a new program in your start menu called FreeRIP MP3 Converter.
Setting up to Convert your CDs
- Create a folder on your hard drive called "MP3 Music". This is where your albums will be stored.
- Create a folder on your hard drive called "CD Labels". This is where your album art will be stored.
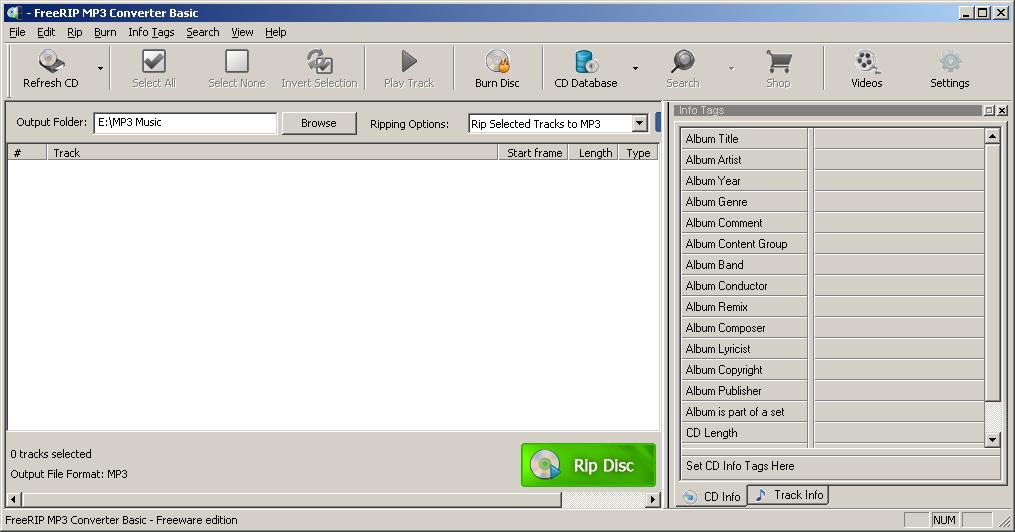
- Start the FreeRIP MP3 program.
- Click on "File -> Settings -> Output Filename Template" The Output File name Format window pops up.
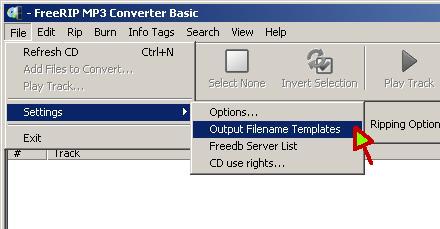
Choose the first template, which should be "Artist\Track Number-Track Title.ext" and click OK. This will make the program put all the songs of the current cd into a sub-directory whose title is the name of the artist.
- In the upper left portion of your program window, you will find a small box to choose your output folder.
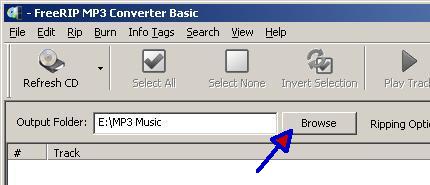
Click on the browse button, and then choose the "MP3 Music" folder that you created in step 1. This is where your Music files will be created when you do the conversion.
- On the toolbar, click the little down-arrow next to the "Refresh CD" button.
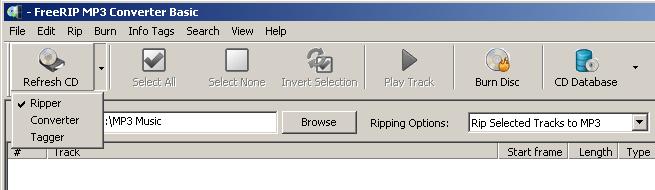
Make sure that "Ripper" is selected. then, in the "Ripping Options" box, choose "Rip Selected tracks to MP3"
|
Now that FreeRIP is set up to convert your CDs to MP3 files, you can convert all your CDs using the following example.
1. Insert a music CD into your CD or DVD drive.
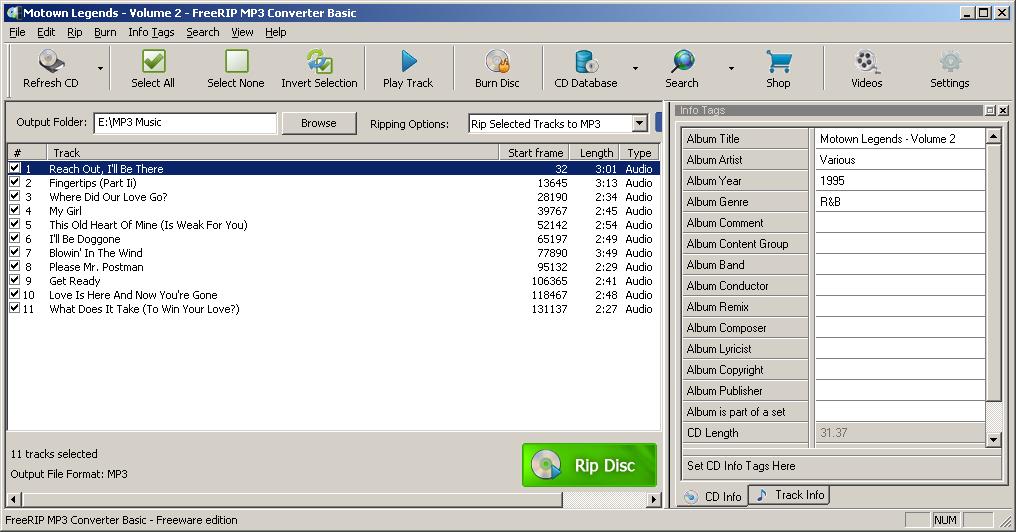
I'm using a CD called "Motown Legends Volume 2". Give the program about a minute to read the disc and search the online database for the names of the tracks and album. Once it finds the information, a list of songs will come up in the Track List window. Make sure the check boxes to the left of each song is filled. (If windows brings up a warning window about inserting an audio CD, close that window.)
2. Get on the internet and search Amazon Music (https://www.amazon.com/music) for the album title.
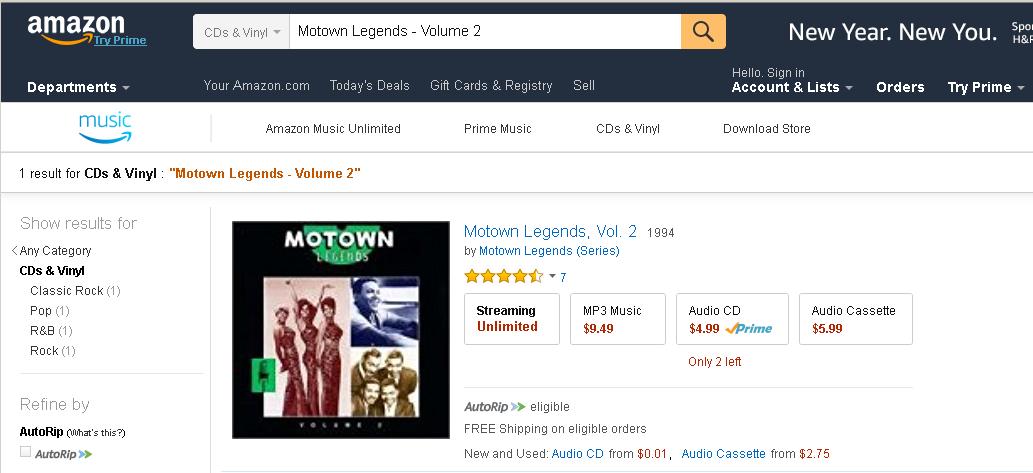
You should be able to locate a photo of the album cover. Download the photo, (right-click on the photo and select "Save image as"), and place it in the "CD Labels" directory that you created earlier.
3. At the bottom right of your program window, click on the "Track info" tab.
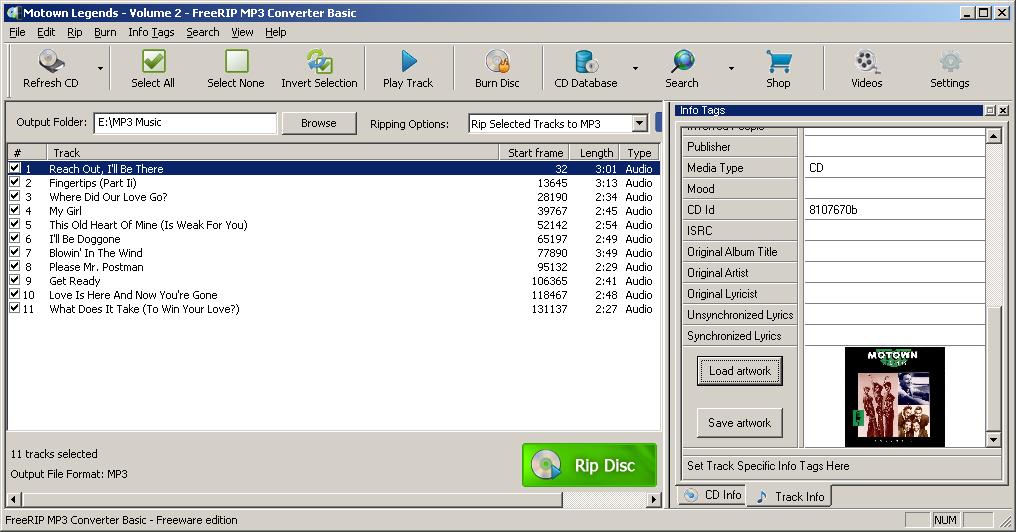
Scroll to the bottom of the track info list and find the "Load artwork" button and click on it. Then navigate to the "CD Labels" directory, choose the appropriate artwork that you just downloaded, and click the "Open" button.
4. Press the green "Rip Disc" button at the bottom of the FreeRIP window.
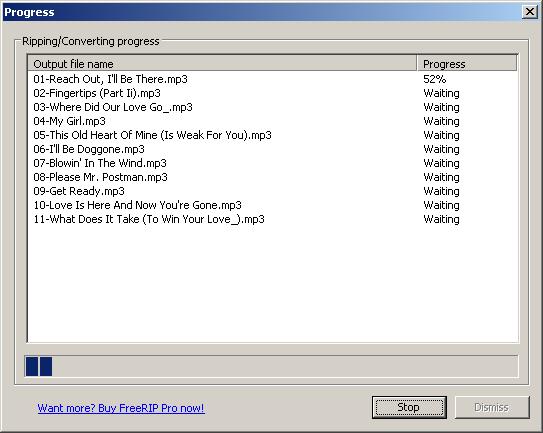
A progress window will pop up, and the program will proceed to convert all the tracks on the CD. When it is finished, Windows Explorer window will pop up showing the folder where the MP3 music files are stored.
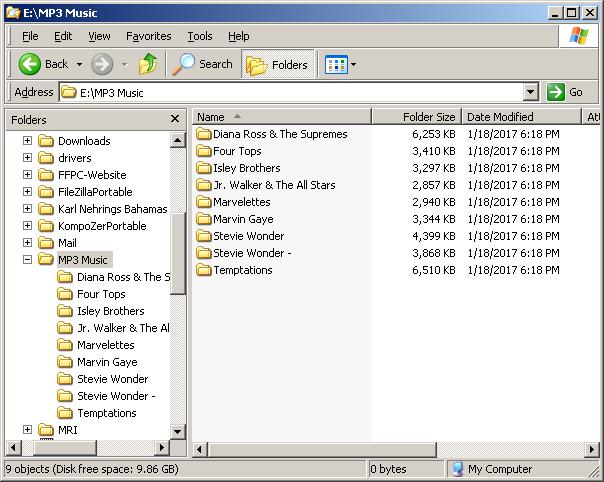
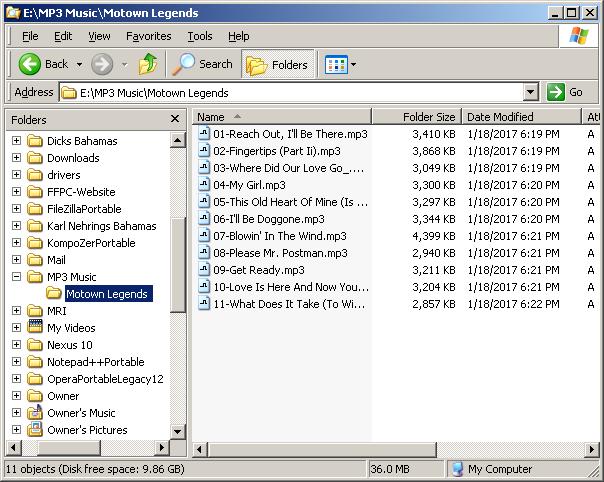
Note that in this case, since more than one artist was featured on the album, the songs were divided up into subfolders for each artist. I like to keep a directory for each album, so I simply created a folder called "Motown Legends" and copied all the MP3 files into that folder, and deleted the individual artist folders.
You can avoid this last step by creating a new "output file name format" in the initial setup step 4 that looks like the highlighted one in the list below:
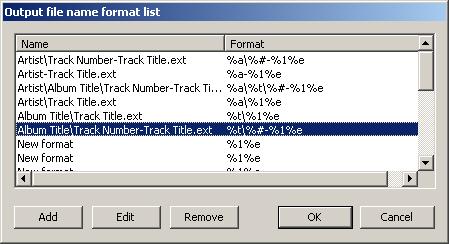
After creating the new template, you then Click on "File -> Settings -> Options
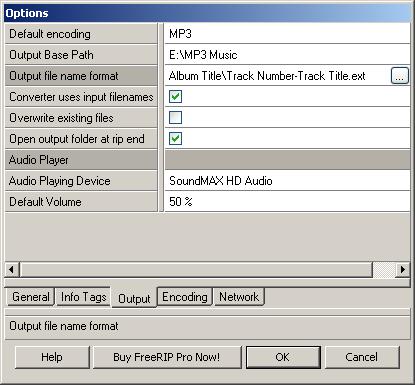
Then click on the "Output tab, and change the "Output file name format" to the newly created template.
Now repeat the above four steps for each of your CDs. When you are finished, you can copy the complete MP3 Music folder to a USB Memory Stick, which you can use in your car to listen to your albums on the road.
In addition to Ripping CDs, FreeRIP MP3 will also allow you to enter track information into any MP3 music files that you may have. If someone gives you music files that don't have the title, artist, and other information included, you can enter that information into the "Track Info" column of the program. Here is a hint. If you have a MP3 song whose title and author you don't know. Play the song on your computer. While it is playing, take out your phone and say "OK Google, What is the name of this song?" Then hold the phone up to your computer speaker and wait a few seconds. Most of the time, Google will identify the song, and give whatever other information it can find about the track. I tried it, and it only missed one song out of 75.
Copyright © 2014 - 2026 Bergerweb.net.
Page modified: June 17 2017.